
Instructor Tools Documentation
Student answer sheets will be scanned within 72 hours (3 days).
- You will receive an email when your key(s) and student answer sheets have been scanned.
- UP instructors, please pick up your sheets from the Scanning Operations office in Rm. 105 in the Pollock Testing Center at 504 Pollock Rd. We no longer return UP answer sheets by Campus Mail because there were too many delivery problems.
- Sheets with errors will be separated from other sheets. Unscanned sheets may be corrected and returned for scanning and added to the other data.
After you receive your email, you may log into the Scanning Instructor Tools website to fix any errors, rescore your exam, and generate exam reports.
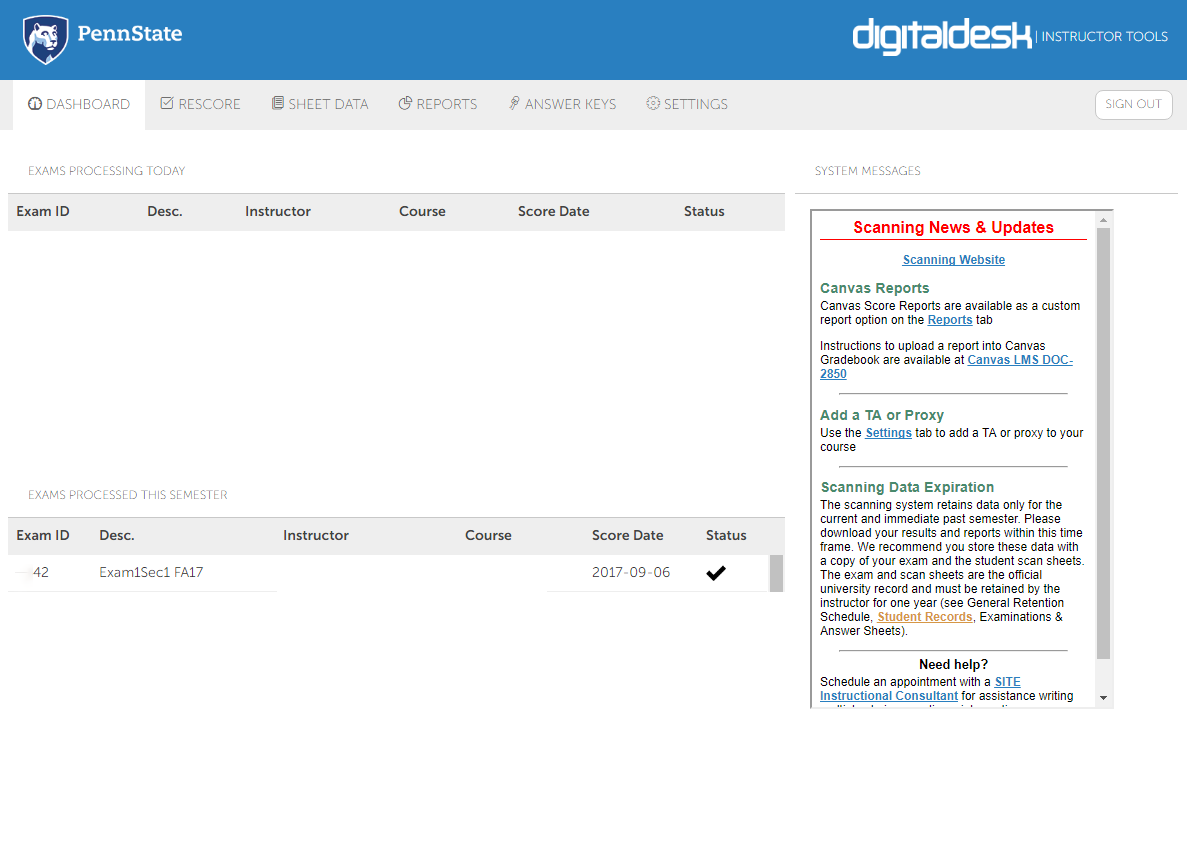
Main Functions
Beyond the Dashboard and Settings, the site has 4 main functions; Rescore, Sheet Data, Reports, Answer Keys. The Settings section allows you to add a proxy user. The proxy user has the same access as you. The proxy user must be listed as an instructor in LionPath.
Rescore
This page is used to rescore your exam after you…
- Changed any of your answer keys on the Answer Key page
- Corrected any answers on student sheets from the Sheet Data page
- Configured weighting on the Answer Key page
- Omitted any question(s) on the Answer Key page
- Changed the question status to a bonus question on the Answer Key page
- Added bonus points for an individual or entire class (not associated with a question) on the Rescore page
- After you are finished scoring your exam, this page can also be used to release reports to your students.
Rescore Instructions
- Click the RESCORE tab.
- Select your Exam ID from the dropdown list.
- If you have made changes to your answer key forms and did not previously answer "Yes" to rescore your exam when prompted on the ANSWER KEYS page, you can rescore your exam now by clicking the "Rescore Exams" button.
- To add bonus points to an individual, select "Add Bonus Points", enter the number of points to add, then select the student's name from the list.
- Click Rescore Exams.
- If you want to remove the bonus points, repeat the process with a negative point value.
- The Reset button clears the Exam ID to let you select and rescore another exam. It does not reverse any changes you have made.
- To release student score reports, check the box and click "Rescore Exams". The score reports are emailed to your students via an automated process.
Sheet Data
This page allows you to…
- Associate answer sheets to students that did not include or incorrectly coded their student ID
- Select an answer key/form code for students that did not fill out the form code on their answer sheet
- Correct a student's stray or double marks on their answer sheet
- View raw exam scores
Sheet Data Instructions
- Click on the SHEET DATA tab.
- Select the Exam ID from the dropdown list. The students' answer sheets will render in the window.
- Select a specific student or sheet number to edit. The sheet details will appear in the right pane.
- To correct a response, click the appropriate question in the SHEET RESPONSES window, from the dropdown list select the answer that was actually bubbled in on the answer sheet .
- Click "Update"
- Click "Save"
- After you have saved all of your changes, you need to return to the RESCORE page and run a rescore exams operation before changes to the student's score become effective.
- To correlate a missing student's name or ID with a sheet number:
- Sheets without a name are listed first
- Find the corresponding hard copy sheet of the same number—sheet numbers are printed in the answer sheet's left margin.
- Click on the sheet number
- In the SHEET RESPONSES window click EDIT, fill-in the student's information in the text boxes provided.
- Click "Update"
- Click "Save" when finished.
Reports
This page allows you to…
- Generate and download all reports by exam
- Generate and download selected reports by exam
- View online and/or download score graphs
- Release reports to your students
Reports Instructions
- Click the REPORTS tab.
- Select an exam from the dropdown list.
- Click "Get Exams".
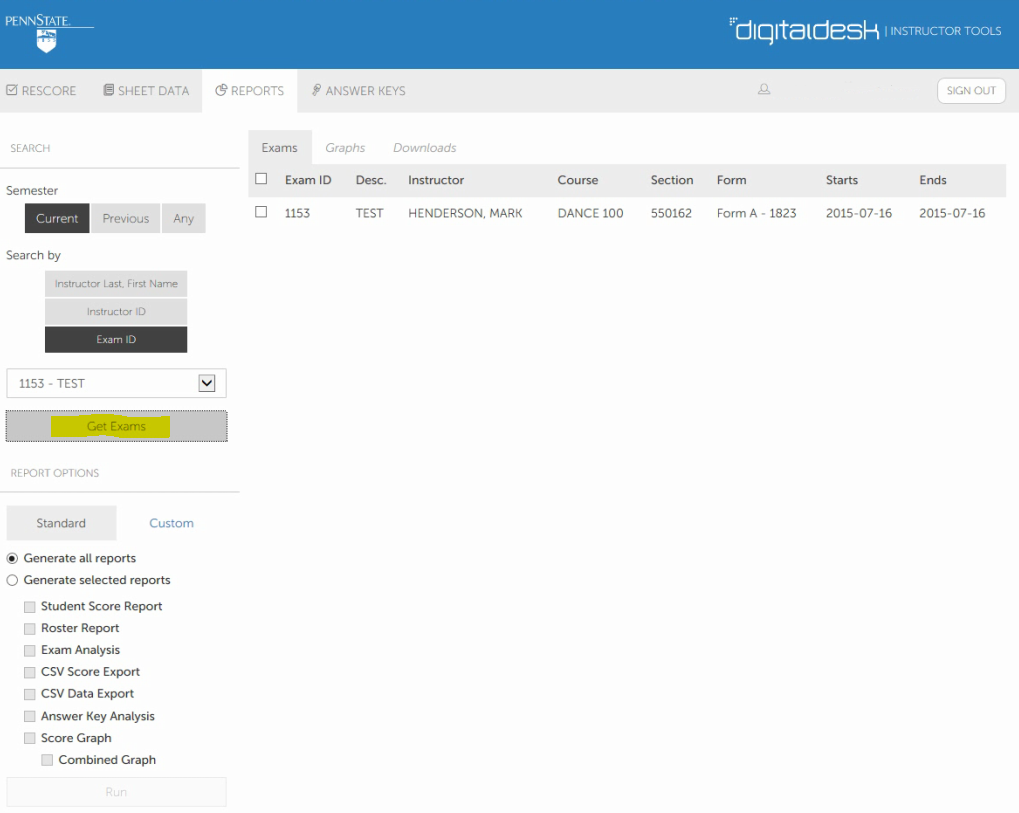
- Click the check box to select the exam.
- You can generate all available standard reports at once by selecting "Generate all reports" and selecting "Run".
- Or you can run individual reports by selecting "Generate selected reports".
- Once the reports are completed, a number will appear next to the Downloads menu item.
- Click the Downloads item

- An "Available Reports" window will display.
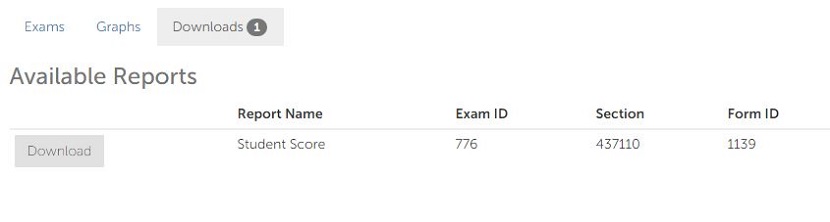
- Click the "Download" button to download and view your report.
- You can also release the student score reports in this module. Select your Exam ID, click Get Exams, select the exam check box and click Release Student Score Reports.
Answer Keys
This page allows you to…
- Edit answer keys electronically
- Change the correct answer
- Add multiple correct answers
- Add item weighting
- Add response weighting
- Link various versions of your keys to create an association to the primary key, which will provide a single item analysis report.
- Omit a question
- Add bonus points
Answer Keys Instructions
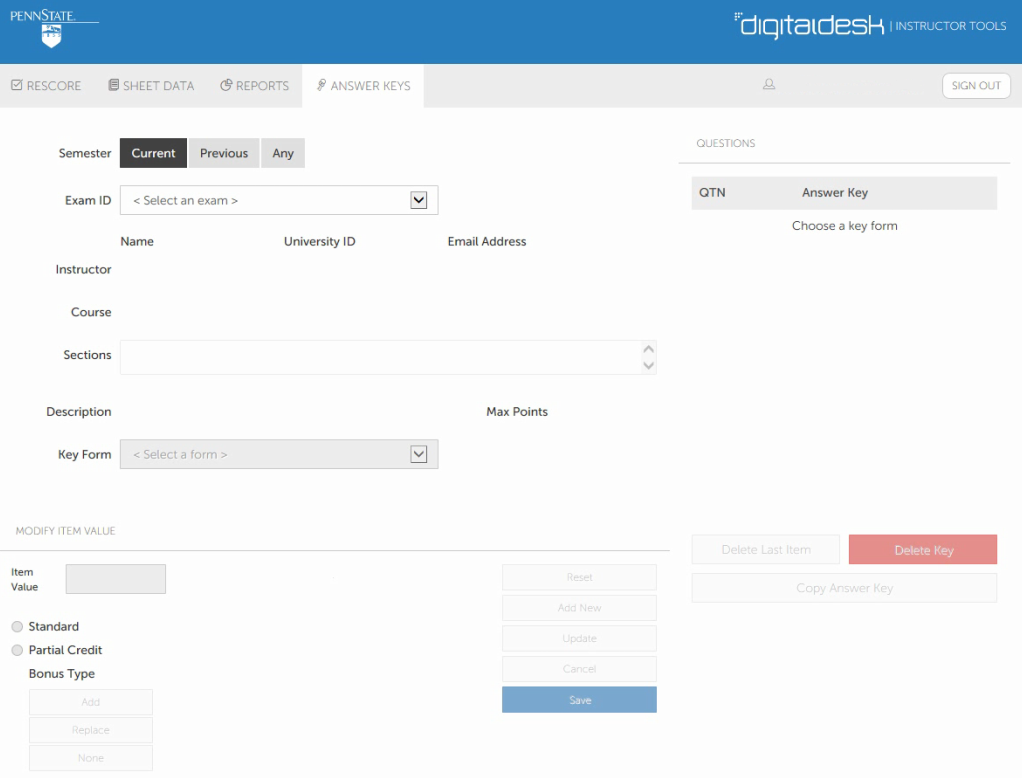
- Click on the ANSWER KEYS menu.
- Select the Exam ID from the dropdown list.
-
Select the Key Form you want to edit from the dropdown list.
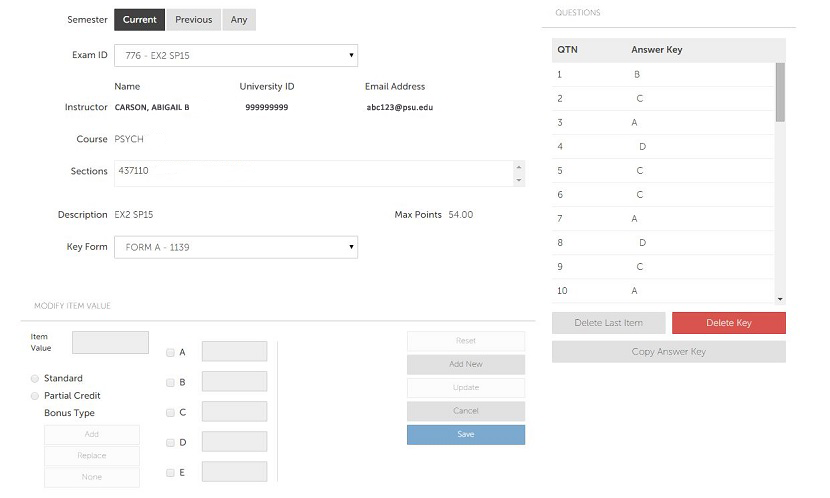
- The answer key will be displayed.
-
To change any aspect of a particular question, click on the question
number in the QUESTIONS box and the Modify Item Value window will
populate with the current question settings.
Note: In this screen shot example, the exam was scanned with values of 36 questions equaling 54 points so the default score for each question is 1.5 points (54 divided by 36). [The default scoring profile for all exams is "Points per question = Total points divided by the # of questions".\ The system can accept tenths of points. The modify item value window is used only if you want to change the points assigned to each question or response, change the actual correct answer, award partial points to other than the correct answer, allow multiple correct answers, or make a particular question a bonus question.
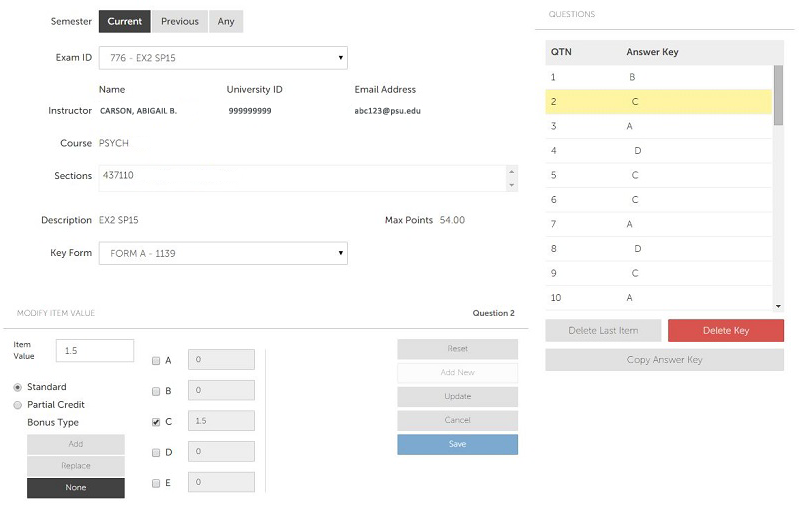
- Standard = One correct answer only, awarded the value in the Item Value box
- Partial Credit = Multiple answers are correct with varying Item Values per choice selected
- Bonus Type = Either a Standard or Partial Credit question can be indicated as a Bonus question
- Add = Add the Item value to the student's score, final results may be greater than 100%
- Replace = Replace the value of the bonus question, final results not to exceed 100%
- None = Normal question, not a bonus question
- Click the "Update" button after each question or question property modification.
- When you are completely finished updating the answer key, click "Save".
- You will be prompted to update the scoring profile—click "Yes" to update, "No" to cancel.
- Another prompt will pop-up to ask you to rescore the exams. Click "Yes" if you have made any changes and the system will automatically rescore the exam. Check the RESCORE page for changes to student scores.
Other Common Tasks
Canvas Reports
Canvas Score Reports are available as a custom report option on the Reports tab. Instructions to upload a report into Canvas Gradebook are available at Canvas LMS DOC-2850.
Omitting question(s) without credit
Note: To omit with credit, you must first omit without credit, then go to "Giving the entire class additional points" to add points.
- After your sheets have been scanned, click on the ANSWER KEYS tab.
- Select your exam ID from the dropdown list.
- Select the form you want to edit.
- In the QUESTIONS box, highlight the first question to omit.
- In the Item Value box, set the value to zero.
- Click "Update".
- Repeat this process for each question you want to omit.
- Click "Save" when finished.
Giving students credit for any bubbled in answer
Note: This will not give credit to students who left a question blank. If you want to give all students points for a question, even if they did not answer the question, first omit the question with 0 pts then give the entire class points using the "Giving the entire class additional points" feature.
- After your sheets have been scanned, click on the ANSWER KEYS tab.
- Select your exam ID from the dropdown list.
- Select the form you want to edit.
- In the QUESTIONS box, highlight the question.
- Select all answers by placing a check mark in the box to the left of each letter.
- The item value for each answer will be set to the value in the Item Value field.
- Click the Update button.
- Click "Save" when finished.
Giving the entire class additional points
Note: This will not give credit to students who left a question blank. If you want to use this feature to give all students points for a question, even if they did not answer the question, first omit the question with 0 pts then give the entire class points using this feature.
- If you wish to give all students extra points, you should do this before giving individual students a different number of points.
- After your sheets have been scanned, click on the RESCORE tab.
- Select your exam ID from the dropdown list.
- Select the check box to the left of Add Bonus Points.
- Enter the point value you want to add.
- Make sure that All is selected.
- Click Rescore Exams.
- You will see in the Bonus column that the students received the Bonus points.
Giving an individual student additional points
- If you wish to give all students extra points, you should do that before giving individual students a different number of points.
- After your sheets have been scanned, click on the RESCORE tab.
- Select your exam ID from the dropdown list.
- Select the check box to the left of Add Bonus Points.
- Enter the point value you want to add.
- Make sure that Individual is selected.
- Highlight the student ID you want to give additional points.
- Click Rescore Exams.
- You will notice under the Bonus column that the student received the Bonus points.
Changing the Form for a student answer sheet (if you have multiple exam versions)
- After your sheets have been scanned, click the SHEET DATA tab.
- Select your exam ID from the dropdown list.
- Find and click on the line with the incorrect form in the list of students in the browser.
- In the SHEET RESPONSES window, select the correct Key Version.
- Click "Save", repeat the process for all sheets without form versions.
- After all updates are saved, go to the RESCORE menu item for those sheets to be re-graded.
- Select your exam ID
- Click Rescore Exams
